Using Postman: Difference between revisions
Jump to navigation
Jump to search
| (9 intermediate revisions by 2 users not shown) | |||
| Line 1: | Line 1: | ||
= Connecting Postman to API Gateway = | = Connecting Postman to API Gateway = | ||
== Connect API to | |||
== Connect API to Postman == | |||
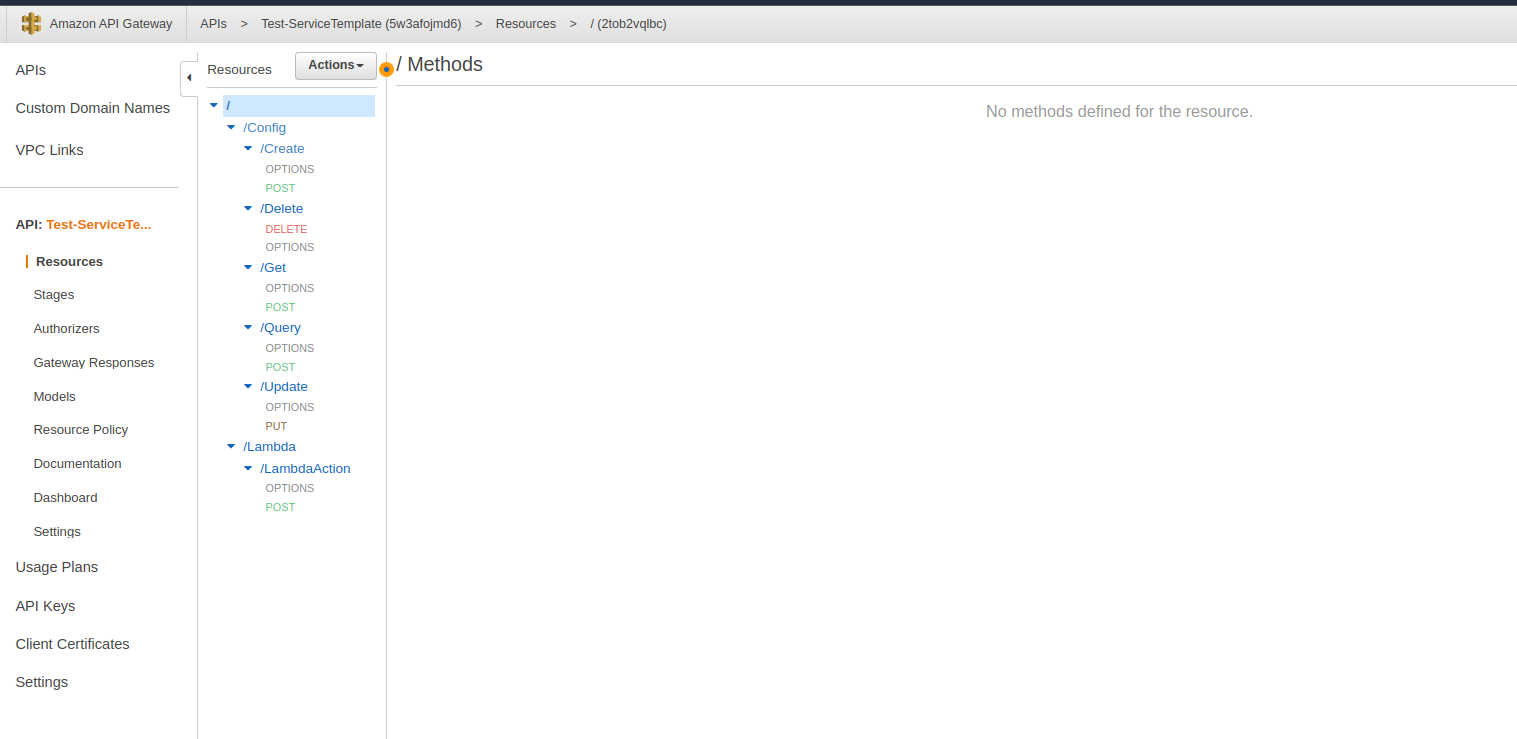
# AWS API Gateway: click name of service api | # AWS API Gateway: click name of service api | ||
#: [[File:Screenshot from 2022-10-10 10-07-58.png]] | #: [[File:Screenshot from 2022-10-10 10-07-58.png]] | ||
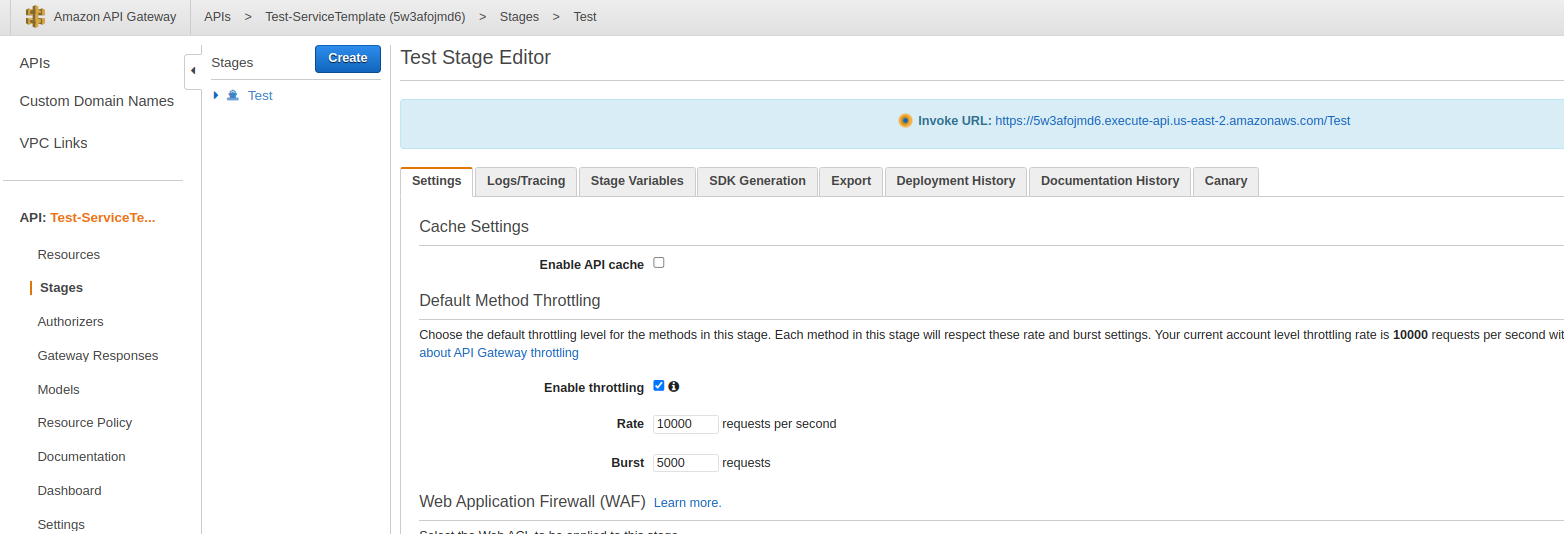
# Click stage /Test | # Click stage /Test | ||
#: [[File:Screenshot from 2022-10-10 10-33-30.png]] | #: [[File:Screenshot from 2022-10-10 10-33-30.png]] | ||
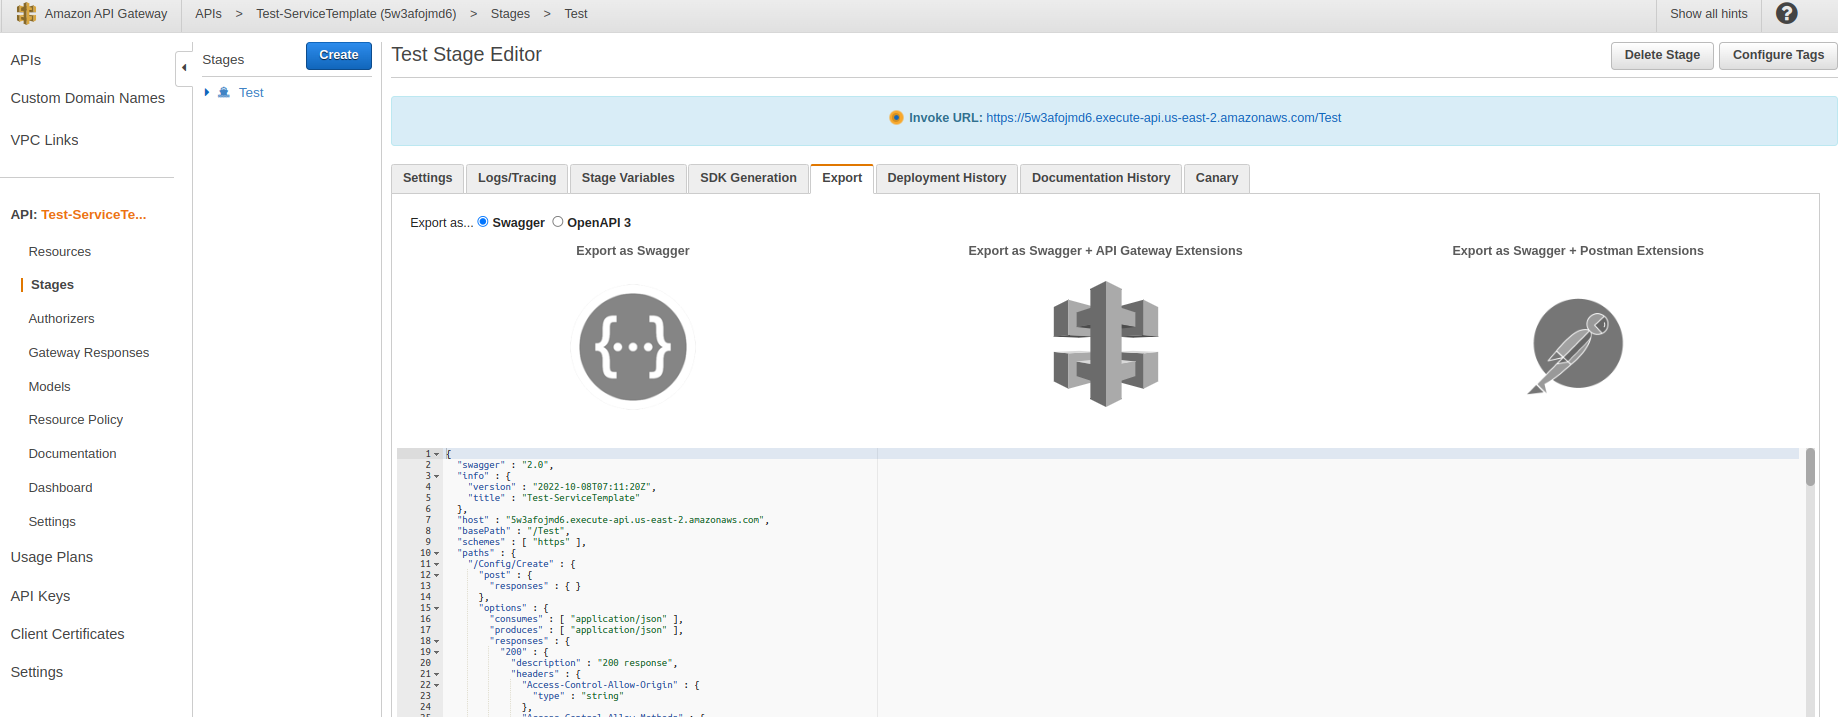
#* and click export choose ..”Export as Swagger+Postman Extensions” copy code JSON | #* and click export choose ..”Export as Swagger+Postman Extensions” copy code JSON, if Postman does not work with JSON, try YAML | ||
#: [[File:Screenshot from 2022-10-10 10-38-08.png]] | #: [[File:Screenshot from 2022-10-10 10-38-08.png]] | ||
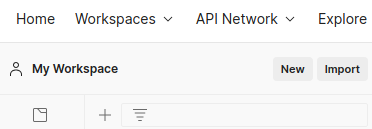
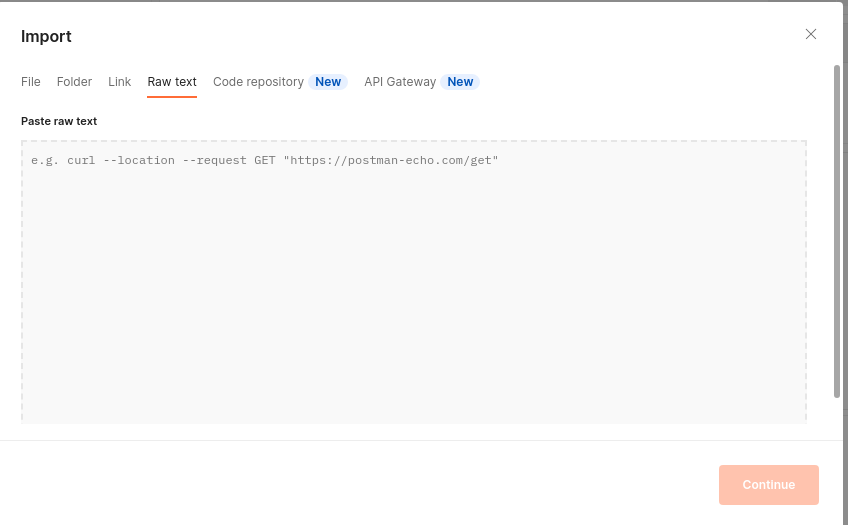
# Go to postman and paste in import/ Raw text/ continue. | # Go to postman and paste in import/ Raw text/ continue. | ||
| Line 13: | Line 15: | ||
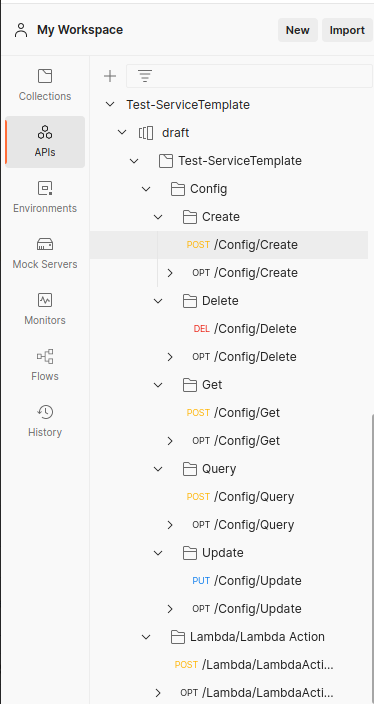
#: [[File:Screenshot from 2022-10-10 10-46-07.png]] | #: [[File:Screenshot from 2022-10-10 10-46-07.png]] | ||
== Manually get Access Token == | |||
=== Method 1: Use Izara frontend === | |||
* Only works if frontend signin currently functioning | |||
web interface: https:// | |||
web interface: https://d1ky427yqbqz8o.cloudfront.net/buying | |||
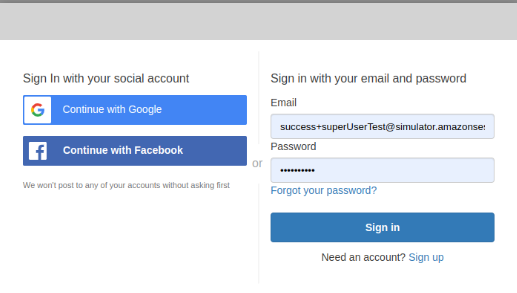
# Navbar > Sign in using mock account (suggested), if you signup with new user will get default role in basicUser, that mean you NOT allow to access all functions. | # Navbar > Sign in using mock account (suggested), if you signup with new user will get default role in basicUser, that mean you NOT allow to access all functions. | ||
#:[[File:Screenshot from 2022-10-10 10-55-56.png]] | #:[[File:Screenshot from 2022-10-10 10-55-56.png]] | ||
| Line 23: | Line 29: | ||
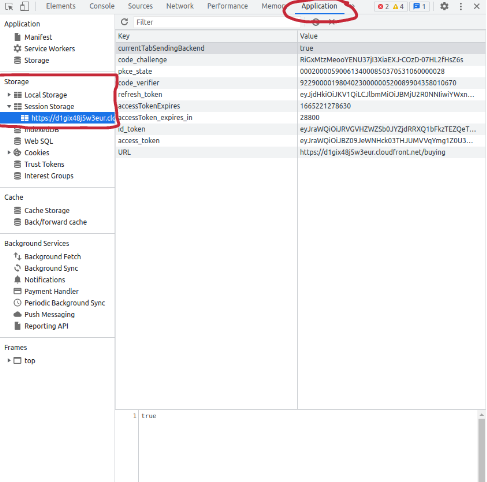
#* Session Storage > http... > access_token and copy these token to postman | #* Session Storage > http... > access_token and copy these token to postman | ||
#:[[File:Screenshot from 2022-10-10 10-58-56.png]] | #:[[File:Screenshot from 2022-10-10 10-58-56.png]] | ||
=== | === Method 2: Use AWS Interface and Postman === | ||
# go to AWS > Cognito > UserPool > App Client Settings | |||
# click on Laung Hosted UI for correct client app | |||
# sign in | |||
# Cognito will try to redirect and may fail, but can copy code from url: | |||
#: [[File:CognitoSignInUrlWithCode_2023-01-13_12-45-29.png]] | |||
# Postman setup new request as follows: | |||
#: [[File:PostmanConfigForRequestToken_2023-01-13_12-49-57.png]] | |||
# invoke request and should get access token | |||
# TTL of token will depend on setting in Cognito app, can increase so not need to do often | |||
=== Add Access Token to Postman requests === | |||
# paste token to Authorization > TYPE: Bearer Token >> [Token] ... | |||
#: [[File:Screenshot from 2022-10-10 11-00-12.png]] | |||
# For auth: UserLevel, need to send '''“targerUserId”''' in Params > Path Variables > KEY: targetUserId, VALUE: <targetUserId> | |||
== Default Test Seed Data email accounts == | |||
Email use in web interface for get access token. | Email use in web interface for get access token. | ||
# basicUserA | # '''basicUserA''' | ||
#:Email: success+basicUserTest@simulator.amazonses.com | #:Email: success+basicUserTest@simulator.amazonses.com | ||
#:Password: Abc123456! | #:Password: Abc123456! | ||
# verifiedUserA | # '''verifiedUserA''' | ||
#:Email: success+verifiedUserTestA@simulator.amazonses.com | #:Email: success+verifiedUserTestA@simulator.amazonses.com | ||
#:Password: Abc123456! | #:Password: Abc123456! | ||
# verifiedUserB | # '''verifiedUserB''' | ||
#:Email: success+verifiedUserTestB@simulator.amazonses.com | #:Email: success+verifiedUserTestB@simulator.amazonses.com | ||
#:Password: Abc123456! | #:Password: Abc123456! | ||
#superUserA | #'''superUserA''' | ||
#:Email: success+superUserTest@simulator.amazonses.com | #:Email: success+superUserTest@simulator.amazonses.com | ||
#:Password: Abc123456! | #:Password: Abc123456! | ||
= | = Setup requests in Postman = | ||
# click on workspace and choose folder and file testing | |||
:[[ | #* click Body choose raw > JSON and push your request in code block. | ||
#* and send message. | |||
#: [[File:Screenshot from 2022-10-10 11-31-23.png]] | |||
# below block show return response. | |||
#* If test api works . will show '''return response''' and status code: '''200 OK''' | |||
#* You can see more response see in '''cloudwatch''' in function testing. | |||
#: [[File:Screenshot from 2022-10-10 11-39-07.png]] | |||
= [[API Gateway Authorizers]] = | |||
Latest revision as of 06:55, 19 January 2023
Connecting Postman to API Gateway
Connect API to Postman
- AWS API Gateway: click name of service api
- Click stage /Test
- and click export choose ..”Export as Swagger+Postman Extensions” copy code JSON, if Postman does not work with JSON, try YAML
- Go to postman and paste in import/ Raw text/ continue.
- Now My Workspace connect to Api finished.
Manually get Access Token
Method 1: Use Izara frontend
- Only works if frontend signin currently functioning
web interface: https://d1ky427yqbqz8o.cloudfront.net/buying
- Navbar > Sign in using mock account (suggested), if you signup with new user will get default role in basicUser, that mean you NOT allow to access all functions.
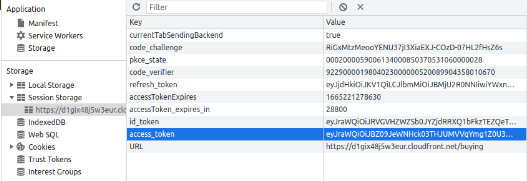
- F12 to see element
- select tab >> Application
- Session Storage > http... > access_token and copy these token to postman
Method 2: Use AWS Interface and Postman
- go to AWS > Cognito > UserPool > App Client Settings
- click on Laung Hosted UI for correct client app
- sign in
- Cognito will try to redirect and may fail, but can copy code from url:
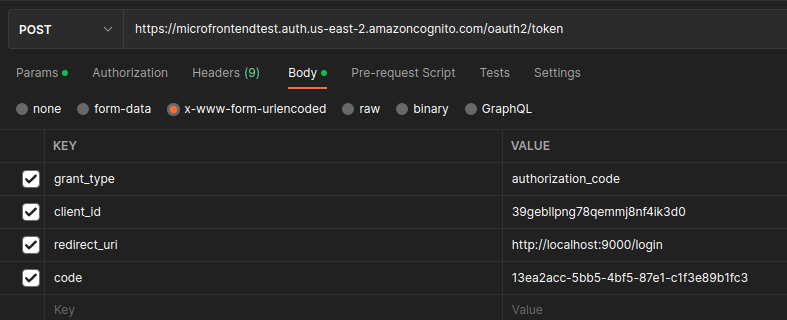
- Postman setup new request as follows:
- invoke request and should get access token
- TTL of token will depend on setting in Cognito app, can increase so not need to do often
Add Access Token to Postman requests
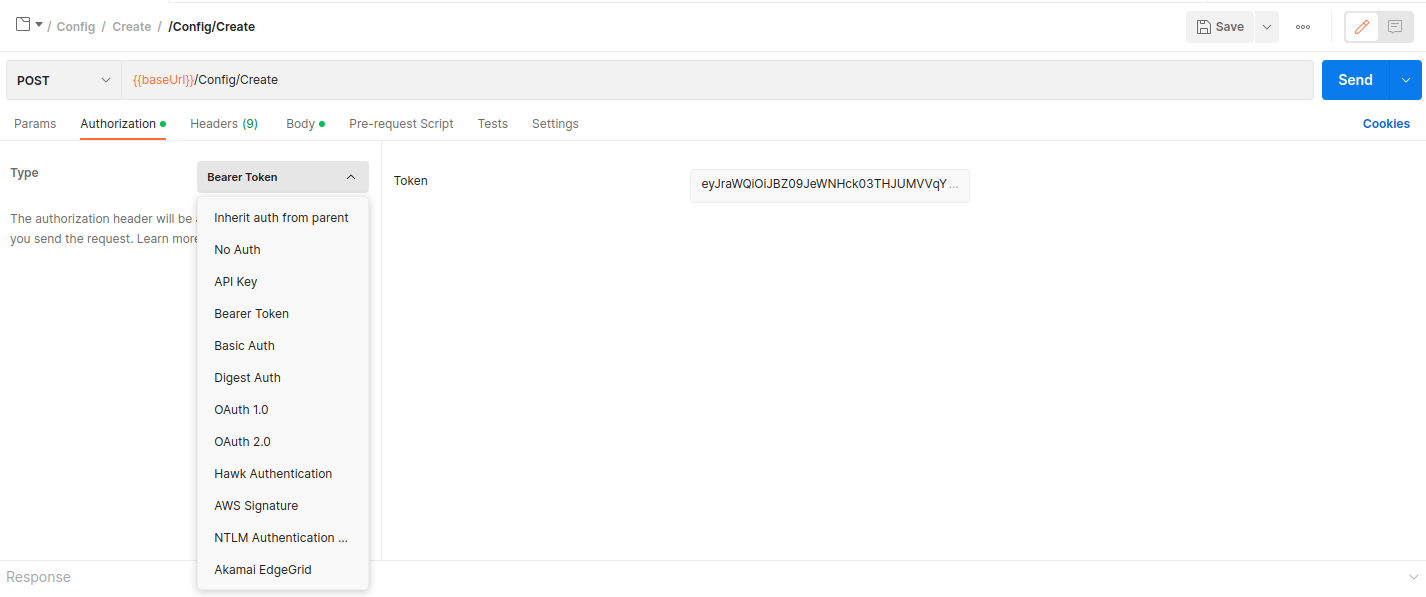
- paste token to Authorization > TYPE: Bearer Token >> [Token] ...
- For auth: UserLevel, need to send “targerUserId” in Params > Path Variables > KEY: targetUserId, VALUE: <targetUserId>
Default Test Seed Data email accounts
Email use in web interface for get access token.
- basicUserA
- Email: success+basicUserTest@simulator.amazonses.com
- Password: Abc123456!
- verifiedUserA
- Email: success+verifiedUserTestA@simulator.amazonses.com
- Password: Abc123456!
- verifiedUserB
- Email: success+verifiedUserTestB@simulator.amazonses.com
- Password: Abc123456!
- superUserA
- Email: success+superUserTest@simulator.amazonses.com
- Password: Abc123456!
Setup requests in Postman
- click on workspace and choose folder and file testing
- click Body choose raw > JSON and push your request in code block.
- and send message.
- below block show return response.
- If test api works . will show return response and status code: 200 OK
- You can see more response see in cloudwatch in function testing.
